Introducing 22oz Copper Insulated Water Bottles! Cold for 48 hours & Hot for 12. In the SHOP Now

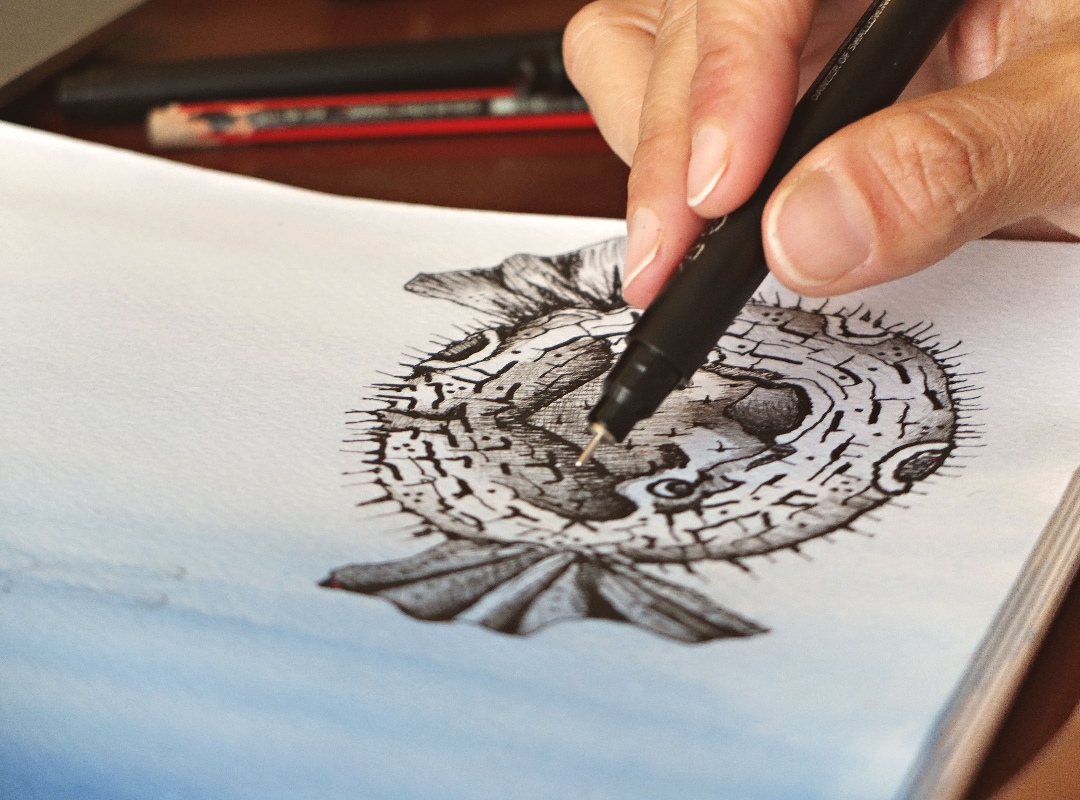
Drawing Pens for Beginners: Understanding Fine-Liners
Drawing pens are one of the simplest mediums to start with, no long list of accessories, no complicated paper rules. Here's what you actually need to know about nibs, sizing, testing ink quality, and picking your first pen.
 ByLeona

As a hidden object botanical line artist drawing pens were a major part of my art before I switched to digital. I used them daily. This is probably one of the few mediums that do not have a laundry list of accessories, papers on the other hand are a different story. This post hopes to provide you with knowledge about drawing pens, their many names, nibs, as well as, paper and the few accessories.
When many decide to try drawing pens, they are often stumped by what to put in the search bar. Here are a few of those search terms:
- Technical Pens / Drafting Pens
- Drawing Pens or Illustration Pens
- Line Art Pens or Permanent Ink Pens
- Felt-tip Pens (sometimes with “fine” or “micro” added)
- Pigment Liners or Multiliners
- Micro-liners or Fine-Liners
- Fiber-tip Pens
Regardless of which term in that long list you use, you will get close to what you want. My advice: stick with the terms drawing pens or fine-liners.
Many of the terms above are proprietary or simply what different manufacturers chose to call them. Unlike other mediums, this one developed over time, evolving from a need for a simpler, disposable version of the original tool: The Technical Pen.
Technical Pens vs. Modern Disposable Drawing Pens
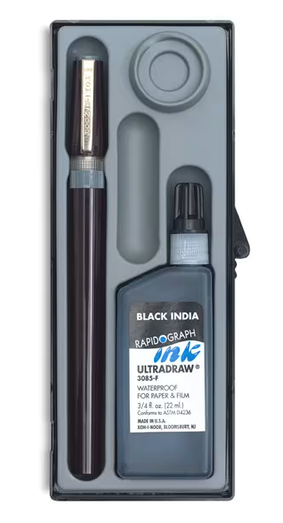
Historically, a Technical Pen (or Drafting Pen) was a highly precise, engineering-grade instrument. Before computers and CAD (Computer-Aided Design) software, architects, engineers, and mapmakers used them to draw blueprints with exact, unvarying line widths.
While disposable drawing pens have largely taken over for everyday art, traditional technical pens are refillable instruments made of plastic and metal. They feature a unique, hollow steel tube for a nib with a microscopic wire inside that regulates the flow of ink. While I personally do not have experience drawing with traditional technical pens, researching them provides great context for how our modern pens stack up:
| Feature | Traditional Technical Pen | Modern Disposable Drawing Pen |
| Nib Material | Solid Stainless Steel or Tungsten Tube | Felt, Plastic, or Fiber Needle-Point |
| Lifespan | Lifetime (Refillable and modular) | Disposable (Tossed when ink runs out or tip frays) |
| Line Consistency | Absolutely permanent and unyielding | Can widen slightly over time if the artist presses too hard |
| Ink Type | Liquid India Ink (drawn from a bottle) | Pigment-based ink suspended in a felt reservoir |
| Maintenance | High. Requires regular cleaning, soaking, and careful storage | Zero. Just cap it when you are done |
| Cost | High upfront investment | Budget-friendly per pen |
Why Artists Still Use Technical Pens
Though computers replaced them in drafting, fine artists and illustrators love traditional technical pens for a few specific reasons:
- The Richest Black Ink: Disposable pens use specialized archival inks that flow through felt. Technical pens use true, dense liquid India Ink, which dries to an incredibly rich, deep, matte black that is completely waterproof and lightfast.
- Unmatched Precision: Because the steel nib never wears down, a 0.18mm line will measure exactly 0.18mm on day one and year five.
- Eco-Friendly & Long-Term Investment: For artists who draw constantly, buying bottles of refill ink is cheaper in the long run than throwing away dozens of plastic disposable pens.
The Takeaway for Beginners: Technical pens are beautiful tools, but they are notorious for clogging if left unused for a few weeks. Cleaning a clogged technical pen requires dismantling microscopic parts, soaking them in specialized cleaning fluid, or using an ultrasonic cleaner. For a beginner just dipping their toes into line art, a high-quality disposable fine-liner will give you the “technical pen look” without the maintenance headache.
Nibs: What You Need to Know
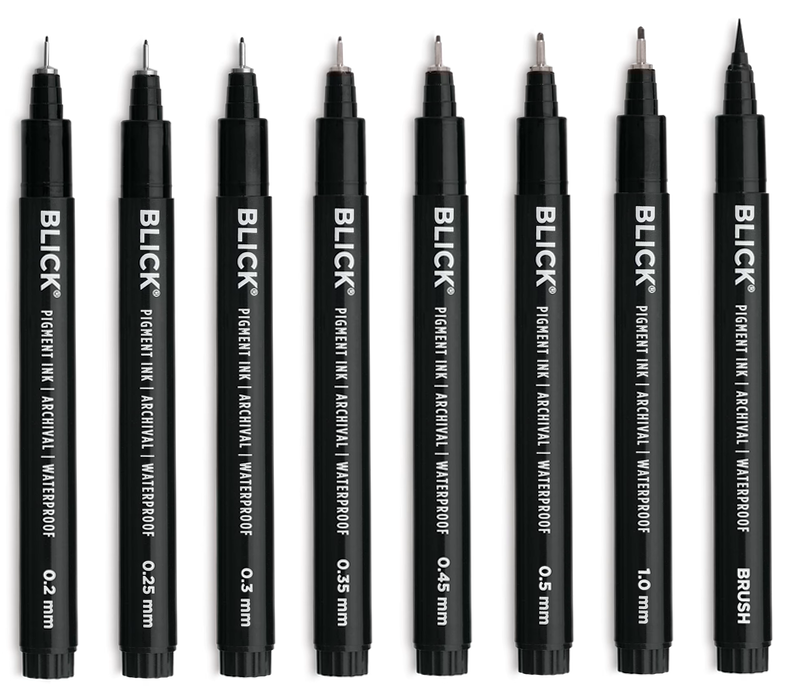
I have mentioned the word nib(s) several times. In case you are wondering, in simple terms it is the pen tip, where the ink flows through onto your paper. Nibs for drawing pens come in a range of sizes.
Understanding the Codes
- The Size Code (e.g., 01, 05, 08): This is an arbitrary numbering system used by some manufacturers to rank pens from thinnest to thickest.
- The Millimeter Measurement (e.g., 0.25mm, 0.45mm): This is the actual width of the line left on the paper.
Drawing Pens / Fine-Liner Size Chart
While exact measurements can vary by a fraction of a millimeter between different manufacturers, this is the “industry standard” for drawing pens:
| Size Code | Actual Line Width (Millimeters) | Common Artistic Use |
| 003 | 0.15 mm | Microscopic details, tight cross-hatching, hair |
| 005 | 0.20 mm | Ultra-fine detailing, light textures, background elements |
| 01 | 0.25 mm | Fine linework, intricate patterns, secondary outlines |
| 02 | 0.30 mm | General sketching, detailed shading |
| 03 | 0.35 mm | Standard writing, clean medium lines |
| 04 | 0.40 mm | Balanced lines, good for intermediate details |
| 05 | 0.45 mm | The Industry Baseline. Primary outlines and main focal linework |
| 08 | 0.50 mm | Bold outlines, border frames, filling small shapes |
| 10 | 0.60 mm | Very thick graphic lines, comic panels |
| 12 | 0.70 mm | Heavy borders, block lettering |
What Should Your First Purchase Be?
If you do not have any experience with line art and are wanting to test the waters of this medium all you need is one pen. You read that right, one pen, I recommend a pen that is 0.5mm, but purchase whichever size you want. It doesn’t matter what brand as you are just testing the medium to see if it is for you. There is no need to go out on day one and purchase some large, or even small, set. This is the Subtraction Method for Art in action, test before you commit, and let the results tell you what to do next.
Buyer’s Tip: The “04” Illusion
Look closely at the above table, and you’ll notice a strange quirk: the standard size code almost never matches the actual millimeter width, with the sole exception of the 04 (which is exactly 0.40 mm). Because of this, it is easy to accidentally buy the wrong size. This happened to me on a few occasions until I happened upon an artist’s blog post talking about this very topic several years ago. My apologies that I can’t remember this artist.
When shopping, it is better to look for the actual millimeter size. Paying attention to the actual millimeter measurement is especially helpful if you are buying pens online, as it ensures you get the exact line thickness you need for your artwork without being misled by the numbers on the cap.
The size code is not a true industry standard at all, hence why the phrase “industry standard” is in quotes above. It is entirely a marketing illusion. Every brand manufactures their pens to their own proprietary specifications and labels them however they please.
- Brand A labels their 0.50 mm pen as an 08.
- Brand B labels their 0.50 mm pen as an 05.
- Brand C abandons numbers entirely and just stamps “0.5” on the cap.
The reason I am saying Brand A, B, C is discussed in the post No Art Supply Brands, No Affiliate Links: A Neutral Space to Learn.
The Takeaway: Don’t trust the big number on the cap! Because sizing isn’t standardized across the art industry, a “05” in one brand is rarely the same thickness as a “05” in another. When switching between brands, always look for the tiny print that lists the actual millimeter (mm) measurement to ensure your line weights stay completely consistent.
I actually own six different brands of drawing pens. All but one brand, ironically one of the most popular brands, is labeled in millimeters. The caps have 0.5, or 0.1 and that is the nibs width 0.5mm and 0.1mm. It is the most popular brand that has the size code labeling issue.
I Love It! What Sizes Do I Need?
When creating line art, it is the weight of the line that implies shadow. As such you need to choose at least three different nib sizes; thick, medium, and thin. The reason I say at least is because I normally wanted two different thin nibs for accents and details. As a rule of thumb, each nib should be around 2mm larger or smaller than the next.
Your thickest pen will be used to infer shadow. As an example I use the thickest pen on the shadow side of a blossoms, stems, and leaves. The medium is the main one you would use for the drawing, and the thin is used for accents and details.
Starting with the 0.5 mm pen, which would be your medium the thick would be 0.7 minimum and the thin nib would be 0.3mm (the extra thin in my case would be 0.1mm). Do not think I am recommending these specific size nibs as your only options, your art, your choice. The example is only to illustrate the 2mm minimum difference between pens.
Some of the combinations I have used: (smallest to largest with 2 thin nibs) If you are only using 3 pens drop one of the smallest nibs.
- 0.03, 0.05, 0.2, and 0.4mm
- 0.05, 0.2, 0.5, and 0.7mm
- 0.3, 0.5, 0.7, and 0.9mm
- 0.2, 0.5, 0.7, 1.0mm
As you can see everything has at least 2mm difference, sometimes larger. My medium size nib varied from 0.2mm to 0.7mm. Again, Your art, Your Choice!
If you want an easier way, many manufacturers sell small sets of pens with nib sizes that fit the above recommendation. They come in set of 3 – 4 pens.
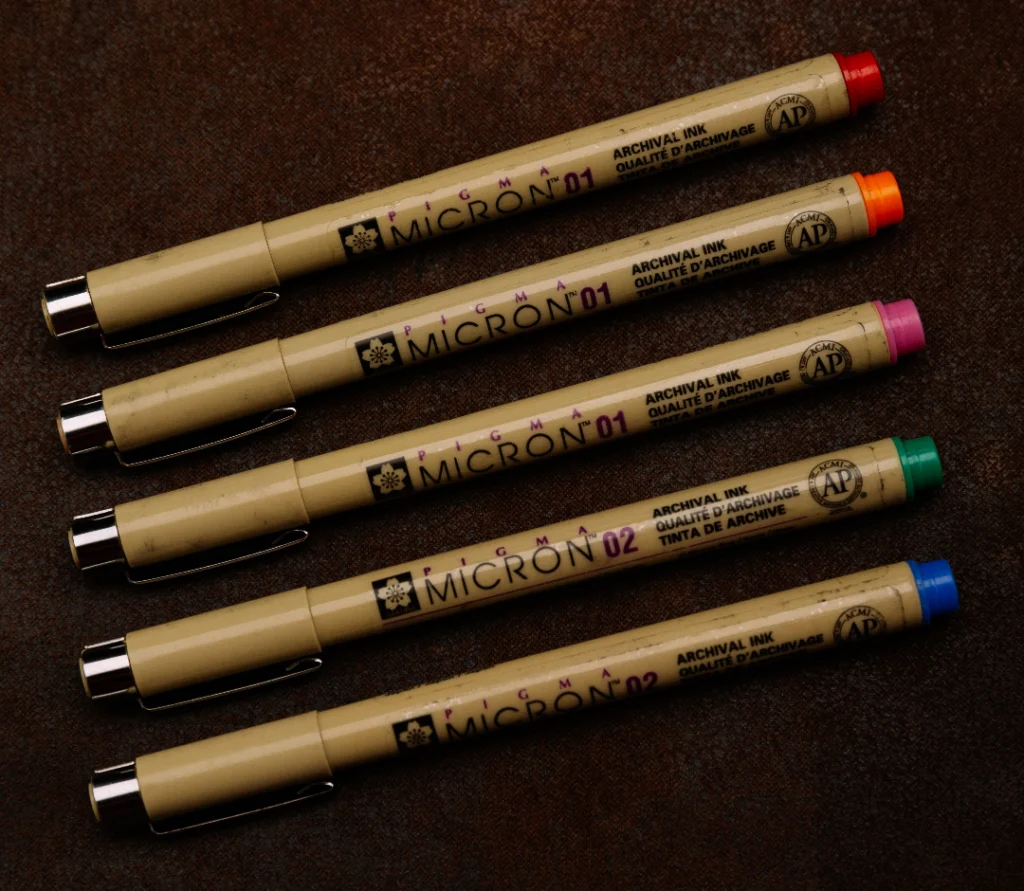
Choosing a Brand
There are a few things you should know when it comes to choosing which pen to use. The first is how it feels in your hand.
I have several sets for this reason and why I can tell you to only buy one pen. If you are in a physical store buying your pen, pay close attention. How a pen feels in your hand as you draw with it is uniquely personal. Some like a pen with a wide barrel, others want something very slender. Depending on the size of your hand, the ridge created by the cap could be uncomfortable. Additionally, the pens weight, while it is not significantly different brand to brand, there is some.
The second thing is, just like choosing a graphite pencil, how it feels against the paper as you use it. Please, do not ask me to explain how this is so, but there is a difference between brands in how the ink feels as you put it one the page. Some will feel smooth others like you are in a battle. So, try to test all pens before you buy.
Ugh, The Smudging!
One down side to drawing pens it the ink can be smudged by your hand before it fully dries. This is true regardless of whether you are left or right hand dominate. The best way I have discovered to alleviate this problem is to draw, or trace, your lines staring from the side opposite your dominate hand. So a right handed person would start on the left and move to the right. A left handed person would start on the right and work to the left.
I have heard some artist place a piece of paper over the ink to protect it, but for me I inevitably moved that paper and smudged the art anyway. You may have better luck with this one than I did.
Testing the Drawing Pens Ink Quality
When you are just starting out the brand you use doesn’t matter, you are learning the medium. For this reason purchasing budget friendly drawing pens is a smart choice. If you decide drawing pens are going to be a medium for you and want to sell or display your art, you will want a pen that lasts.
Test 1: Does it stay black? Most budget pens will fail this one.
- Draw something on a piece of paper in pencil. (use a soft touch)
- Trace over the pencil drawing with a drawing pen.
- Allow to completely dry. This could take an hour or more. I let mine sit overnight to be sure.
- Pull out your hi-polymer eraser and erase the pencil lines on half of the drawing.
- Once you brush away the crumbs, take a close look at the ink. Is it lighter than the untouched side? If so the drawing pen is not suitable for anything but practice.
Test 2: Make sure the pen is permanent.
- Draw several lines spaced apart in a grid fashion.
- Allow to dry for a bit.
- Dampen a cloth or your fingers with water and gently rub across the lines. Did they smear? If so = Fail.
There are drawing pens that advertise archival ink that will fail one or both of these test. Test 1 will tell you if your ink will remain black (or what ever color you used) or if it will lose some of its color with erasing. Many line art pieces start out as a faint pencil drawing, so you need to know if that black ink can survive removing it. I have two brands that failed this test, one budget friendly, the other more expensive.
Test 2 tell you if the ink is in fact permanent, as permanent ink should pass this test easily. The reason to test is if you take the time to complete an amazing art piece, you want it to stand the test of time and look as good in several years as it did when you first did it. I actually had one brand fail this test and it wasn’t the cheapest one.
A Note on Long-Term Colorfastness
Something worth mentioning honestly, my personal experience with lightfastness only goes back about five years, since that’s the age of my oldest pieces, and I haven’t seen any fading yet. Archival ink is designed to resist fading over time, but I can’t personally speak to exactly how it performs decades down the road. If long-term display matters to you, it may be worth a little extra research into how your specific pen brand’s ink holds up over time.
Paper, So Many Choices!
One of the best things about this medium, it is the most paper friendly of all mediums. The list of papers you can use with drawing pens is vast. I can’t list all of them, but know this is one medium you can experiment with on various papers and have more successes then failures.
The very first paper to have is the one you should already own, a sketchbook or pad. This is what you practice on, just like graphite pencils. I want to interject a reminder here, please date everything you draw. You will appreciate it in a few months or years knowing exactly when you drew something.
As you want to start creating pieces to give as gifts, hang on the wall, or sell the quality of the paper will become more important. One of the best is Bristol paper. While smooth is ideal, it soaks up less ink and is easier on your nibs, vellum will work too.
The main limitation on paper choice is how your nib responds to the surface texture and the amount of ink it soaks up. I am sure you have guessed, the more texture a paper has the rougher it is on the nibs and the more ink it absorbs. This fact does not negate using these papers, you just need to be aware of the consequences.
An unexpected paper choice is standard cardstock, like you would find at a local craft store. It works beautifully for drawing pens and can be very budget friendly. This paper isn’t archival quality, but we all know not every piece of art is meant to last over 50 years.
Accessories Where Are You?
Like I stated in the beginning, drawing pens do not have much in the way of accessories. The ones that do exist only come into play if you are using refillable pens. I can’t offer much advice on these styles, I never tried them. I knew that if I tried to refill a pen with ink there would be more on me and the table then in the pen.
One accessory however is storage. Conventional wisdom says drawing pens should be stored horizontally to keep the ink evenly distributed near the nib. I store mine both ways, some lying flat, some standing upright with the nib pointed down, and honestly, some of my vertically stored pens have been fine for several years. Your mileage may vary, but don’t stress too much about finding the perfect storage system starting out.
Drawing Pens are one of the easiest mediums to use and they have one of the lowest prices of entry. These little beauties don’t have the limitations with paper most mediums do and there is no laundry list of accessories to understand. I admit, as a line artist I am a bit partial to this medium, but I still highly recommend you at least give it a try. In my opinion, fine-liners give a drawing a more permanent grounded feel. For me there was something magical to the look of jet black ink on white paper, although you are not limited to black ink.
Be sure to check out the full series Art Supplies For Beginners.
